25 KiB
Anxinyun Analyze
安心云数据分析工具,
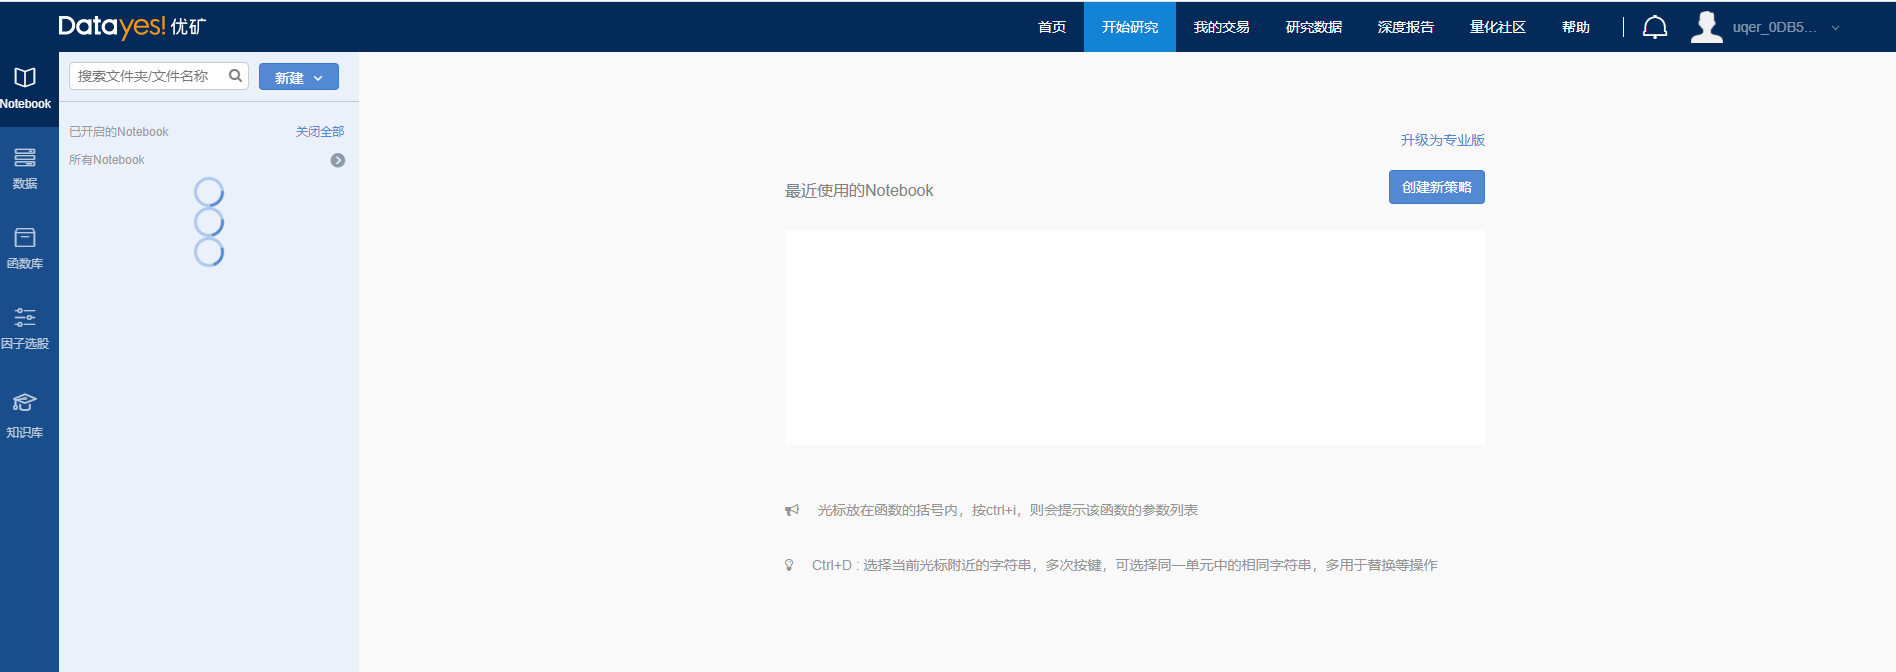
参考实现优矿:
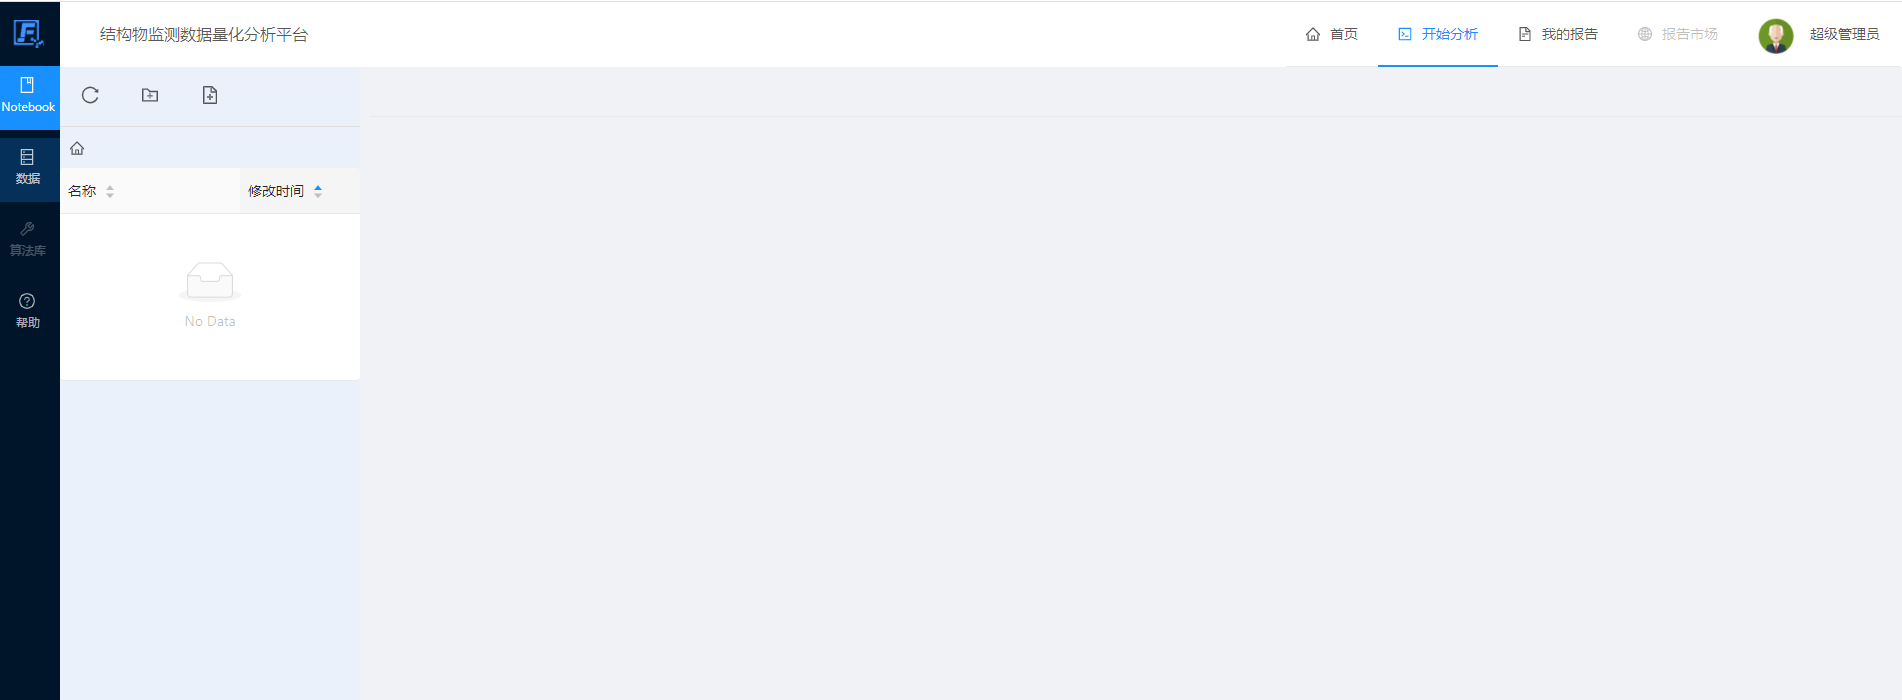
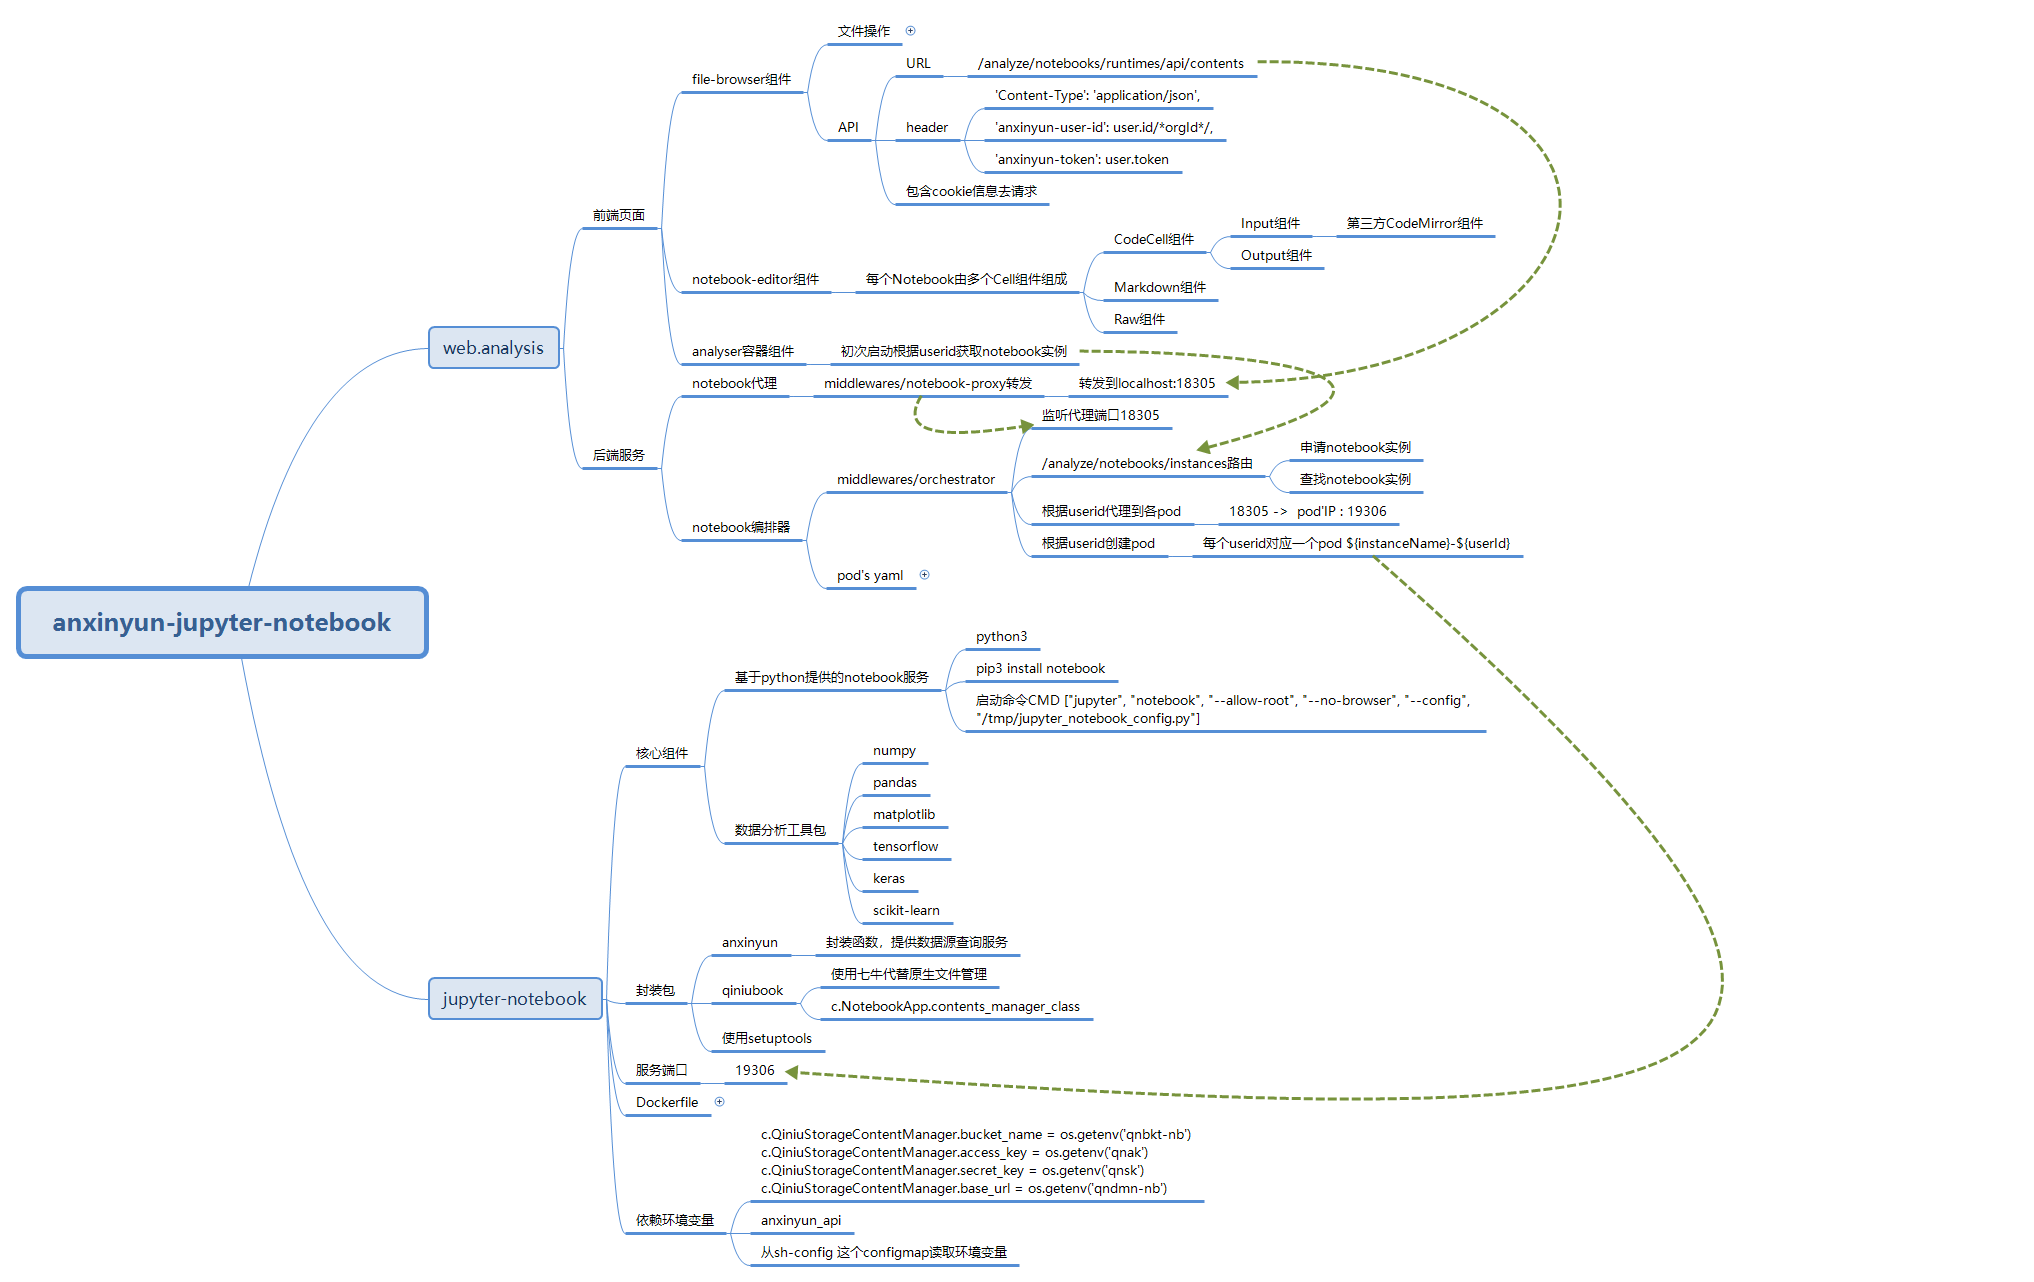
数据分析工具框图 by Tyr.Liu
启动:
config.js
{
    entry: require('./middlewares/orchestrator').entry,
        opts: {
            kubernetes: {
                url: ANXINCLOUD_K8S_API || 'https://10.8.30.157:6443',
                    insecureSkipTlsVerify: true,
                        version: 'v1',
                            promises: true,
                                namespace: 'anxinyun',
                                    auth: {
                                        bearer: ANXINCLOUD_K8S_AUTH || '......'
                                    }
            },
                //runInPod: true,
                apiUrl: ANXINCLOUD_API,
                    notebookToken: '6bf509929765366acb8ef066aa30d2cfc57af186a25f229a',
                        instanceName: 'anxinyun-jupyter-notebook',
                            proxyPort: 18305
        }
}
set NODE_ENV=development&&node server -p 8000 -u http://10.8.30.157:19084 --qnak YwL-KPPPrPFqm5VfCDLSSePi6pa0c0rxbTDGVUSQ --qnsk dFHk_EfTk6ufIaG56h4gzcL3IrAtwl2RkJcl8XuO --qnbkt notebook-test --qndmn http://pcd3v07yz.bkt.clouddn.com
# -u 数据API地址
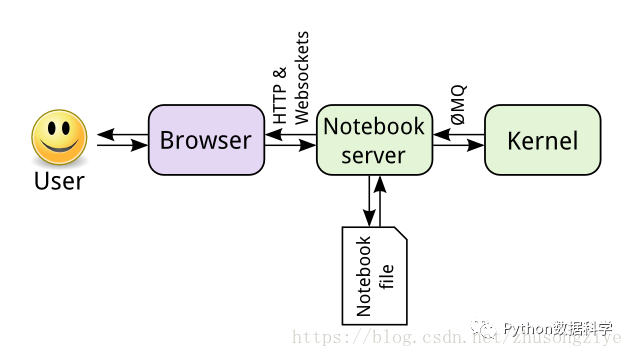
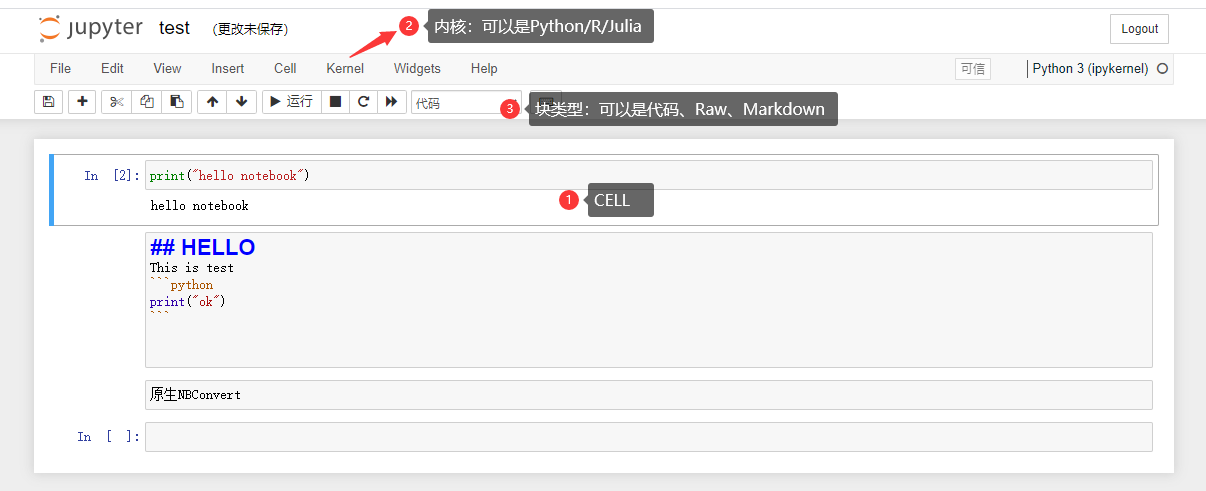
Jupyter Nootbook
新的名称 Jupyter 由Julia、Python 和 R 组合而成
安装使用
pip3 install jupyter
# 使用帮助
jupyter notebook -h

# 启动
jupyter notebook
修改文件路径
jupyter notebook --generate-config

# file:///C:/Users/yww08/.jupyter/jupyter_notebook_config.py
# c.NotebookApp.notebook_dir = 'E:/tmp/notebook'
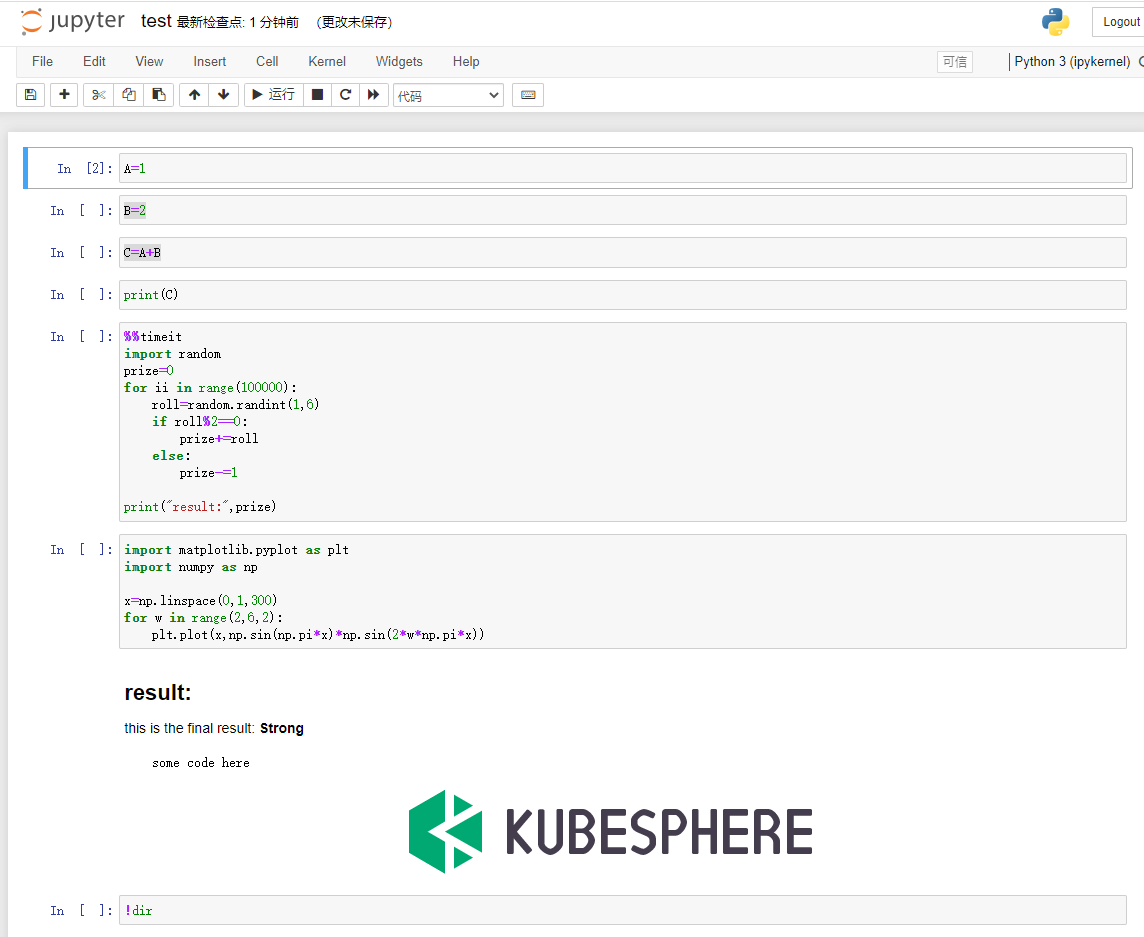
Magic操作(基于IPython)
%%timeit
测算整个单元格的运行时间
K8S API 鉴权
kubectl get sa -n anxinyun

# clusterrole.yaml
kind: ClusterRole
apiVersion: rbac.authorization.k8s.io/v1
metadata:
  namespace: anxinyun
  name: operator
rules:
- apiGroups: [""] # "" indicates the core API group
  resources: ["services","pods"]
  verbs: ["get", "watch", "list","create","update","patch"]


kubectl create clusterrolebinding operator-pod \
  --clusterrole=operator  \
  --serviceaccount=anxinyun:default


fastest@test-master:~$ kubectl get sa -n anxinyun -o yaml
apiVersion: v1
items:
- apiVersion: v1
  kind: ServiceAccount
  metadata:
    creationTimestamp: "2020-08-17T10:35:35Z"
    name: default
    namespace: anxinyun
    resourceVersion: "5982"
    selfLink: /api/v1/namespaces/anxinyun/serviceaccounts/default
    uid: a1100eea-19c2-4477-afca-61344353f2e5
  secrets:
  - name: default-token-zp6cz
kind: List
metadata:
  resourceVersion: ""
  selfLink: ""
fastest@test-master:~$ kubectl describe secret default-token-zp6cz -n anxinyun
Name:         default-token-zp6cz
Namespace:    anxinyun
Labels:       <none>
Annotations:  kubernetes.io/service-account.name: default
              kubernetes.io/service-account.uid: a1100eea-19c2-4477-afca-61344353f2e5

Type:  kubernetes.io/service-account-token

Data
====
ca.crt:     1025 bytes
namespace:  8 bytes
token:      eyJhbGciOiJSUzI1NiIsImtpZCI6ImFiVlF0Y1NyZjNNTkRVMFVieTNNTzhyVlc5T094Y3J2RmFfYTF6R0pveDQifQ.eyJpc3MiOiJrdWJlcm5ldGVzL3NlcnZpY2VhY2NvdW50Iiwia3ViZXJuZXRlcy5pby9zZXJ2aWNlYWNjb3VudC9uYW1lc3BhY2UiOiJhbnhpbnl1biIsImt1YmVybmV0ZXMuaW8vc2VydmljZWFjY291bnQvc2VjcmV0Lm5hbWUiOiJkZWZhdWx0LXRva2VuLXpwNmN6Iiwia3ViZXJuZXRlcy5pby9zZXJ2aWNlYWNjb3VudC9zZXJ2aWNlLWFjY291bnQubmFtZSI6ImRlZmF1bHQiLCJrdWJlcm5ldGVzLmlvL3NlcnZpY2VhY2NvdW50L3NlcnZpY2UtYWNjb3VudC51aWQiOiJhMTEwMGVlYS0xOWMyLTQ0NzctYWZjYS02MTM0NDM1M2YyZTUiLCJzdWIiOiJzeXN0ZW06c2VydmljZWFjY291bnQ6YW54aW55dW46ZGVmYXVsdCJ9.elI35PPYtQp-fletleFR7so88Vozk7g8B7oRa1zy2LxSL1m26s8X6SJAipR5uqweNyi8JML3Yo3lPhs6mmzNLxkTRVk1atyXcCSr6J_iPD2dUUaGTL-ZPRYZ1x8Eb2PfugEQM5tf5YXERXqPpEsxTLM83KkI8ogFJQhLG7s-lWZFbvcgmKpCo3lmzuYf-hO0-JngjLhRxptCUqaFx6s8QwQz0dxNn_EvtMXbZm2cTkewJdsFAzczuKtt2sLiJCl5CSRghWAqkP9pBiC2diwDKzz9A0DevG0b3n7J-9_4fPtbXa5zQI60Rg3XVZRof0XNjw5Nze0ee8bn-6XI8yxIug
fastest@test-master:~$
本地Micro-K8S
安装WSL
适用于 Linux 的 Windows 子系统可让开发人员直接在 Windows 上按原样运行 GNU/Linux 环境(包括大多数命令行工具、实用工具和应用程序),且不会产生传统虚拟机或双启动设置开销。
POWERSHELL
》wsl --install

PS C:\Users\yww08> wsl --list --online
以下是可安装的有效分发的列表。
请使用“wsl --install -d <分发>”安装。

NAME            FRIENDLY NAME
Ubuntu          Ubuntu
Debian          Debian GNU/Linux
kali-linux      Kali Linux Rolling
openSUSE-42     openSUSE Leap 42
SLES-12         SUSE Linux Enterprise Server v12
Ubuntu-16.04    Ubuntu 16.04 LTS
Ubuntu-18.04    Ubuntu 18.04 LTS
Ubuntu-20.04    Ubuntu 20.04 LTS
PS C:\Users\yww08> wsl --install -d Ubuntu-18.04
正在下载: Ubuntu 18.04 LTS
[======================    38.4%                           ]

创建linux用户
Installing, this may take a few minutes...
Please create a default UNIX user account. The username does not need to match your Windows username.
For more information visit: https://aka.ms/wslusers
Enter new UNIX username: yww
Enter new UNIX password: 123
Retype new UNIX password: 123
passwd: password updated successfully
Installation successful!
To run a command as administrator (user "root"), use "sudo <command>".
See "man sudo_root" for details.

更新首选包管理器定期更新和升级包
sudo apt update && sudo apt upgrade

通过/mnt/c/ 可以访问宿主机上的文件
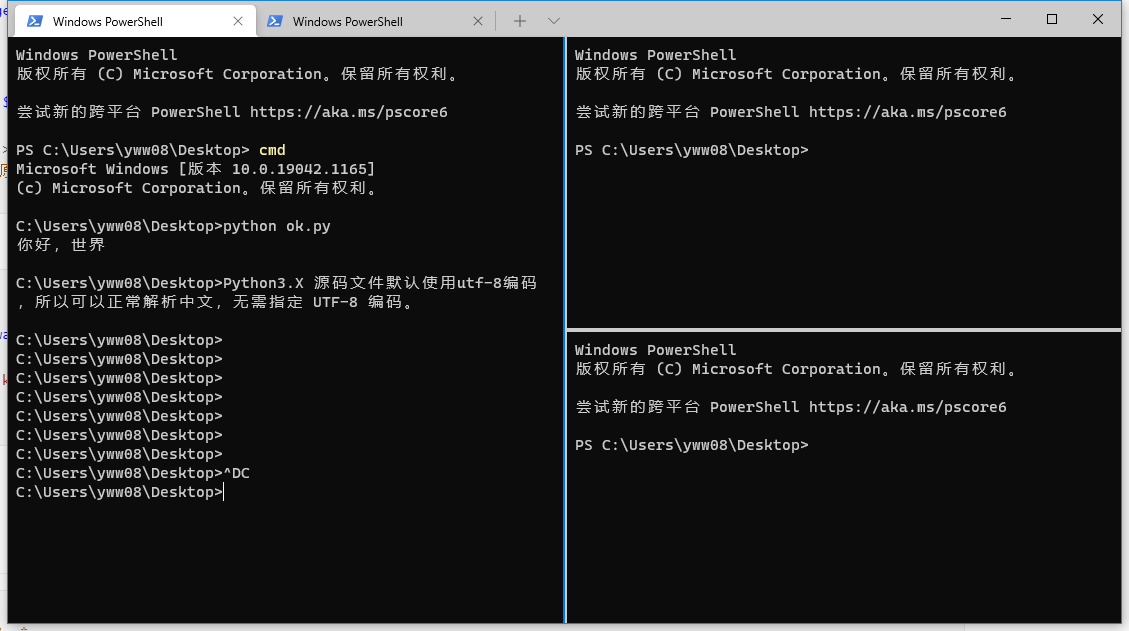
设置Windows终端:
ctrl+shift+d 新Tab
alt+shift+d Split窗口
ctrl+shift+w 关闭
#安装docker
apt install docker.io

sudo usermod -aG docker $USER

sudo cgroupfs-mount
sudo service docker start

#systemctl daemon-reload
#systemctl restart docker.service

# 上面的安装方法有问题
curl https://get.docker.com | sh
【MicroK8S】 Github
Install MicroK8s with:
尝试失败了!!!
snap install microk8s --classic
MicroK8s includes a microk8s kubectl command:
sudo microk8s kubectl get nodes
sudo microk8s kubectl get services
To use MicroK8s with your existing kubectl:
sudo microk8s kubectl config view --raw > $HOME/.kube/config
将用户添加如 microk8s用户组,以实现对k8s的访问
sudo usermod -a -G microk8s <username>
Kubernetes插件
MicroK8s installs a barebones upstream Kubernetes. Additional services like dns and the Kubernetes dashboard can be enabled using the microk8s enable command.
sudo microk8s enable dns dashboard
Use microk8s status to see a list of enabled and available addons. You can find the addon manifests and/or scripts under ${SNAP}/actions/, with ${SNAP} pointing by default to /snap/microk8s/current.
Copy from Kai.Lu
镜像准备fetch-images.sh
#!/bin/bash
images=(
k8s.gcr.io/pause:3.1=mirrorgooglecontainers/pause-amd64:3.1
gcr.io/google_containers/defaultbackend-amd64:1.4=mirrorgooglecontainers/defaultbackend-amd64:1.4
k8s.gcr.io/kubernetes-dashboard-amd64:v1.10.1=registry.cn-hangzhou.aliyuncs.com/google_containers/kubernetes-dashboard-amd64:v1.10.1
k8s.gcr.io/heapster-influxdb-amd64:v1.3.3=registry.cn-hangzhou.aliyuncs.com/google_containers/heapster-influxdb-amd64:v1.3.3
k8s.gcr.io/heapster-amd64:v1.5.2=registry.cn-hangzhou.aliyuncs.com/google_containers/heapster-amd64:v1.5.2
k8s.gcr.io/heapster-grafana-amd64:v4.4.3=registry.cn-hangzhou.aliyuncs.com/google_containers/heapster-grafana-amd64:v4.4.3
k8s.gcr.io/metrics-server-amd64:v0.3.6=registry.cn-hangzhou.aliyuncs.com/google_containers/metrics-server-amd64:v0.3.6
)

OIFS=$IFS; # 保存旧值

for image in ${images[@]};do
    IFS='='
    set $image
    docker pull $2
    docker tag  $2 $1
    docker rmi  $2
    docker save $1 > 1.tar && microk8s.ctr --namespace k8s.io image import 1.tar && rm 1.tar
    IFS=$OIFS; # 还原旧值
done
./fetch-images.sh

microk8s status --wait-ready

alias mk='microk8s.kubectl'

mk get pods -A
Python
#!/usr/bin/python
# -*- coding: UTF-8 -*-

print( "你好,世界" )

#Python3.X 源码文件默认使用utf-8编码,所以可以正常解析中文,无需指定 UTF-8 编码。

注释:
# 单行
'''
多行
'''

"""
多行
"""

类型:
数字
字符串
列表 list1 = ['Google', 'Runoob', 1997, 2000]
元祖 (元素值是不允许修改) (tup1 = ('physics', 'chemistry', 1997, 2000))
字典 dict1 = { 'abc': 456 }
集合 a = set('abracadabra') 或者 可以用大括号({})创建集合。注意:如果要创建一个空集合,你必须用 set() 而不是 {} ;后者创建一个空的字典,下一节我们会介绍这个数据结构。


删除元素 del a['k']
range

时间:
import time  # 引入time模块

ticks = time.time()
print "当前时间戳为:", ticks
| en((1, 2, 3)) | 3 | 计算元素个数 |
|---|---|---|
| (1, 2, 3) + (4, 5, 6) | (1, 2, 3, 4, 5, 6) | 连接 |
| ('Hi!',) * 4 | ('Hi!', 'Hi!', 'Hi!', 'Hi!') | 复制 |
| 3 in (1, 2, 3) | True | 元素是否存在 |
| for x in (1, 2, 3): print x, | 1 2 3 | 迭代 |
笔记
a,b=0,1
while b<10:
	print(b,end=',')
	a,b=b,a+b

print()
# while else 循环
c=0
while c<10:
    print(c)
    c+=2
else:
    print("after c=",c)

# set顺序是乱的
chars=set('abcdefg')
for c in chars:
    print(c)

# range([start,]stop[,step])
for i in range(5,21,2):
    print(i)

# for array
a=['a','b','c']
for i in range(len(a)):
    print(i,':',a[i]);

# 空语句 可以用pass占位

## 迭代器
a=[1,2,3,4]
it=iter(a)
print(next(it))
for i in it:
    print('in range:',i)

# while next 写法
import sys
list=[1,2,3,4]
it = iter(list)    # 创建迭代器对象

while True:
    try:
        print (next(it))
    except StopIteration:
        print ('finished')
        break
        #sys.exit()

print('is here?')

# 通过yield生成斐波那契数列
def fibonacci(n):
    a,b,count=0,1,0
    while True:
        if (count>n):
            return
        yield a
        a,b=b,a+b
        count+=1

f=fibonacci(10)
for fi in f:
    print('f',fi,end=',')


# 函数
def hello() :
    print("Hello World!")

ret=hello()
print('ret:'+str(ret))

'''
不可变类型:strings,tuples,numbers  作为函数参数类似C++中值传递
可变类型: list,dict 作为函数参数类似C++中的引用传递

参数可以按名称传递、可以有默认值
可变长参数如下
'''
def printinfo(arg1,*vartuple):
    print(arg1)
    print(len(vartuple))
printinfo(7)

# 加了两个星号 ** 的参数会以字典的形式导入。

sum=lambda a,b:a+b
print(sum(1,20))

# 列表推导式
vec=[2,4,6]
dd=[3*x for x in vec]
print(dd)

# 字典的便利
dics={'name':'ww','age':18}
for k,v in dics.items():
    print(k,'=',b)

# 遍历技巧
# for i,v in enumerate(list) 同时获得索引和值
# zip(list1,list2) 组合两个序列
# reversed(seq) 反向
# sorted(seq) 排序

## 类型转换
# int(x[, base]) 将x转换为一个整数,base为进制,默认十进制
#
# long(x[, base] ) 将x转换为一个长整数
#
# float(x) 将x转换到一个浮点数
#
# complex(real[, imag])  创建一个复数
#
# str(x) 将对象 x 转换为字符串
#
# repr(x) 将对象 x 转换为表达式字符串
#
# eval(str)  用来计算在字符串中的有效Python表达式, 并返回一个对象
#
# tuple(s) 将序列 s 转换为一个元组
#
# list(s) 将序列 s 转换为一个列表
#
# set(s) 转换为可变集合
#
# dict(d) 创建一个字典。d 必须是一个序列(key, value) 元组。
#
# frozenset(s) 转换为不可变集合
#
# chr(x) 将一个整数转换为一个字符
#
# unichr(x) 将一个整数转换为Unicode字符
#
# ord(x) 将一个字符转换为它的整数值
#
# hex(x) 将一个整数转换为一个十六进制字符串
#
# oct(x)  将一个整数转换为一个八进制字符串
模块学习:
m.py
# !/usr/bin/python3
if __name__=='__main__':
    # 程序独立运行
    pass
else:
    # 程序被模块调用
    print('moduled')

def fabonacci(n):
    a,b,c=0,1,0
    while c<n:
        yield b
        a,b=b,a+b
        c+=1
调用模块:
import m

ret=m.fabonacci(10)

for r in ret:
    print(r)
包的概念:
文件夹 包含 __init__.py
sound/                          顶层包
      __init__.py               初始化 sound 包
      formats/                  文件格式转换子包
              __init__.py
              wavread.py
              wavwrite.py
              aiffread.py
              aiffwrite.py
              auread.py
              auwrite.py
              ...
      effects/                  声音效果子包
              __init__.py
              echo.py
              surround.py
              reverse.py
              ...
      filters/                  filters 子包
              __init__.py
              equalizer.py
              vocoder.py
              karaoke.py
              ...
导入方法中from package import item,item既可以是子模块(子包),也可以是包里面定义的内容(函数或变量)
导入方法中from sound.effects import * 如果这个包里面有子模块,需要定义 __all__变量来说明
__all__ = ['echo','surround','reverse']
输入输出 和 文件操作
# rjust 右对齐
for x in range(1,11):
    print(repr(x).rjust(2),repr(x*x).rjust(3),repr(x*x*x).rjust(4),end=' ')
    print()

print('name is {0},age {1},alias {alias}'.format('ww',18,alias='peter'))

# 读文件
with open('foo.txt','r') as f:
    # 也可以 f.readlines / f.read(length)
    for line in f:
        print (line,end='')

print(f.closed)

# 写文件
with open('bar.txt','w') as f:
    for a in range(0,10):
        f.write(str(a))

f=open('bar.txt','r')
print(f.readlines())
f.close

# 通过pickle实现序列化和反序列化
import pickle,pprint

data1={
    'a':[1,2.0,4+3j],
    'b':('text',u'unicode text'),
    'c':None
}

selfref_list = [1, 2, 3]
selfref_list.append(selfref_list)

output=open('data.pk1','wb')
pickle.dump(data1,output)
pickle.dump(selfref_list,output,-1)
output.close()

# 反序列化
input=open('data.pk1','rb')
data1=pickle.load(input)
pprint.pprint(data1)
pprint.pprint(pickle.load(input))
错误异常

try:
    ...
except OSError as err:
    print('OS Error: {0}'.format(err))
except (RuntimeError,TypeError,NameError):
	pass
except:
    raise
else: # 没有发生异常时执行
    ...
finally: # 永远执行
    ...
面向对象
#!/usr/bin/python3

class people:
    name=''

    # 构造函数
    def __init__(self,n,a):
        self.name=n
        self.age=a

    # 类方法
    def speak(self):
        print("%s speak age %d"%(self.name,self.age))

# 继承 (同时支持多继承,从左往右的规则搜索父类方法)
class student(people):
    grade=''

    # 私有变量
    __private_attrs=0

    def __init__(self,n,a,g):
        people.__init__(self,n,a)
        self.grade=g

    # 覆盖
    def speak(self):
        print("{} speak age {} grade {}".format(self.name,self.age,self.grade))

    # 析构函数
    def __del__(self):
        pass

    # 打印
    def __repr__(self):
        return "myAge:{age}".format(age=self.age)

st = student('ak',16,'g3')
st.speak()
super(student,st).speak() # 调用父类已被覆盖的方法
print(repr(st))
作用域:
Python 中只有模块(module),类(class)以及函数(def、lambda)才会引入新的作用域,其它的代码块(如 if/elif/else/、try/except、for/while等)是不会引入新的作用域的,也就是说这些语句内定义的变量,外部也可以访问,如下代码:
global 和 nonlocal关键字用于在指定作用域内修改全局或闭包外部作用域内的变量
标准库 官方中文文档目录
HTTP请求
from urllib.request import urlopen
for line in urlopen('http://baidu.com'):
    line = line.decode('utf-8')
    print(line)

# pip install requests
import requests

requests=requests.get('http://baidu.com')
print(requests.content)
日志
import logging

logging.warning("warnmsg")

log=logging.getLogger('sk')

# logging.debug(msg, *args, **kwargs)
log.warning('hello')

# 输出 日志级别:日志器名称:日志内容
# 默认是指格式 BASIC_FORMAT "%(levelname)s:%(name)s:%(message)s"

LOG_FORMAT = "%(asctime)s - %(levelname)s - %(message)s"
DATE_FORMAT = "%m/%d/%Y %H:%M:%S %p"
logging.basicConfig(filename='my.log', level=logging.DEBUG, format=LOG_FORMAT, datefmt=DATE_FORMAT)
log=logging.getLogger("filelog")
log.info("this is a log record")

# 打印错误信息和堆栈
logging.warning("Some one delete the log file.", exc_info=True, stack_info=True, extra={'user': 'Tom', 'ip':'47.98.53.222'})
多线程
from threading import Timer
import time

# 定时
def hello():
    print('hello')

t=Timer(4.0,hello)
t.start()

while True:
    time.sleep(1)
数学库
| Quantum Computing | Statistical Computing | Signal Processing | Image Processing | Graphs and Networks | Astronomy Processes | Cognitive Psychology |
|---|---|---|---|---|---|---|
 |
 |
 |
 |
 |
 |
 |
| QuTiP | Pandas | SciPy | Scikit-image | NetworkX | AstroPy | PsychoPy |
| PyQuil | statsmodels | PyWavelets | OpenCV | graph-tool | SunPy | |
| Qiskit | Xarray | python-control | Mahotas | igraph | SpacePy | |
| Seaborn | PyGSP | |||||
| Bioinformatics | Bayesian Inference | Mathematical Analysis | Chemistry | Geoscience | Geographic Processing | Architecture & Engineering |
 |
 |
 |
 |
 |
 |
 |
| BioPython | PyStan | SciPy | Cantera | Pangeo | Shapely | COMPAS |
| Scikit-Bio | PyMC3 | SymPy | MDAnalysis | Simpeg | GeoPandas | City Energy Analyst |
| PyEnsembl | ArviZ | cvxpy | RDKit | ObsPy | Folium | Sverchok |
| ETE | emcee | FEniCS | Fatiando a Terra |
-

NumPy
提供基础的N维数组
-
SciPy library
科学计算基础包
-
Matplotlib
综合的2D图形包
-
IPython
增强的交互控制台
-
SymPy
符号数学
-
pandas
Data structures & analysis 数据结构化和分析工具
